

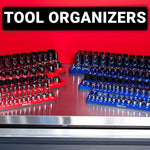
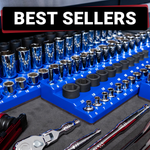






You feel it every time a quick job turns into a tool hunt. The 10mm is missing, the deep socket is in the wrong drawer, and the rail that made sense three months ago now looks like a scrap pile. If you want to organize sockets by size in a way that actually saves time, the goal is not just neatness. It is speed, accuracy, and knowing exactly what is missing before it slows the job down.
A good socket setup does two things at once. It keeps your most-used sizes easy to grab, and it makes visual gaps obvious when a socket does not make it back home. That matters whether you work out of a full service bay, a mobile rig, or one packed garage drawer at home. Clean organization is not about looks. It is about workflow.
Why organize sockets by size in the first place
Sockets multiply fast. Standard and metric. Shallow and deep. Chrome and impact. Multiple drive sizes. Add swivel sockets, specialty pieces, and duplicates from old sets, and the drawer gets crowded in a hurry.
When sockets are not organized by size, small delays stack up. You stop to read markings, sort through mixed rails, or realize halfway through a job that the size you need is somewhere under a ratchet and three extensions. That wasted motion adds up over a week.
There is also the mistake factor. Grabbing the wrong size because the set is mixed or the markings are worn can round fasteners, especially when you are moving quickly. A smart layout reduces that risk because every socket has a fixed place and the sequence itself acts like a double-check.
Start by separating the socket families
Before you line anything up, split your collection into groups that make sense in actual use. Mixing everything into one giant size run looks tidy for about a day, then turns into a mess the minute real work starts.
The cleanest approach is to separate by measurement system first, then by socket type, then by drive size. In practice, that means metric and SAE should not live together if you want fast grabs. After that, separate shallow from deep, and chrome from impact if you use both regularly. Then group by 1/4-inch, 3/8-inch, and 1/2-inch drive.
This is where a lot of setups fail. People sort by size alone and ignore how the sockets are actually used. A 10mm shallow 3/8-inch chrome socket and a 10mm deep 1/2-inch impact socket are both 10mm, but they do not belong in the same working lane. Organize by usage first, then size within that group.
The best order for socket sizing
Once the groups are split, arrange each one in ascending order. That sounds obvious, but it is worth being consistent. Left to right is the easiest for most drawers and rails because it matches how most people scan visually.
For metric sockets, run small to large with no gaps unless a size is truly not part of that set. For SAE, do the same. If you have skip sizes, leave a visible open position if your organizer allows it. Empty spots are useful. They tell you whether a socket is missing or just never belonged there.
Markings matter here. If your sockets have stamped sizes that are hard to read once they get dirty, orientation helps. Keep each socket facing the same way on the organizer so the size marks are readable at a glance. That sounds minor until you have greasy hands and need the right socket in two seconds.
How to organize sockets by size in a real drawer
The best drawer layout depends on how many sockets you own and how often you use them. For a high-use mechanic setup, the smartest move is usually to dedicate zones rather than trying to fit every socket family into one mixed drawer.
Put your most-used drive size in the easiest reach position. For many techs, that is 3/8-inch drive. Place metric shallow and deep where your hand lands first if that is what you reach for all day. SAE or less-used sets can sit farther back or in a neighboring drawer.
If drawer width is limited, keep the sequence simple. One row for metric shallow, one for metric deep, one for SAE shallow, one for SAE deep. If you also carry impact sockets in the same box, give them their own section instead of blending them into chrome storage. The extra separation saves more time than the compactness ever will.
Low-profile organizers work especially well in drawers because they prevent roll-around without wasting vertical space. That matters if your box is already tight or you want to close the drawer without sockets tipping over.
Rails, trays, pegs, and drawer grids
There is no single perfect storage style. It depends on where and how you work.
Socket rails are strong for grab-and-go use, especially if you move between bays or pull complete sets to the job. They keep sizes in order and make missing sockets easy to spot. The trade-off is that some rails can get crowded, and if retention is too loose, sockets shift during transport.
Socket trays are excellent when you want a dedicated home for each size and a cleaner top-down view. They are fast in a stationary box and great for visual inventory. The downside is flexibility. If your collection changes or grows beyond the tray layout, you may outgrow it.
Peg-style organizers can be one of the fastest systems in a drawer because each socket drops into a labeled post. They work best when labels are easy to read and the base is stable. For many mechanics, this is one of the easiest ways to organize sockets by size without overthinking the setup.
Modular drawer systems make the most sense when you want a custom fit around your exact tool loadout. They take longer to build correctly, but they can deliver the cleanest workflow if your box carries a lot more than sockets.
Labeling is not overkill
If you own more than a basic set, labels are worth it. Not because you do not know your tools, but because labels reduce hesitation. That matters at the end of a long day when everything looks the same under bad light.
Use labels for measurement system, drive size, and socket type. Metric deep 3/8-inch should not require a second thought. If your organizer has built-in markings, even better. If not, simple drawer labels or printed markers do the job.
Color coding can help too, especially for quick separation between metric and SAE or chrome and impact. Just keep it consistent. A color system only works if it is obvious enough to read under real shop conditions.
Build around your most-used sizes
Not every socket deserves the same priority. If you work on modern vehicles every day, certain metric sizes will get constant use while others barely move. Your setup should reflect that.
That does not mean breaking the sequence. It means positioning high-use groups where they are fastest to reach and easiest to return. The full set still stays in order, but the sets you touch all day should live in prime space.
Duplicates deserve a decision too. If you have three 10mm sockets, keep one in the main organized set and store extras intentionally. Tossing duplicates into random corners creates clutter fast. A small overflow section for backups works better than letting the main drawer get muddy.
Common mistakes that ruin socket organization
The biggest mistake is mixing categories because it feels efficient in the moment. One mixed rail with metric, SAE, deep, shallow, and impact all together may save space, but it costs time every single day.
The next problem is overpacking the drawer. When sockets are too tight to grab cleanly, people stop putting them back where they belong. Organization only works if return is just as easy as retrieval.
Another common issue is building a system with no room to grow. If every space is packed from day one, the first new set forces a reshuffle. Leave some margin. Good storage should handle growth without turning into a full reorganization project.
Finally, do not ignore damaged or unreadable sockets. If markings are gone and the finish is worn enough to slow identification, that socket is dragging down the whole system.
Keep the system working
Once your sockets are organized, the real test is whether the setup survives busy weeks. That comes down to reset habits. A fast end-of-day check is usually enough. Scan for empty spots, return strays, and make sure duplicates have not crept into the main rows.
If you work mobile or transport tools often, retention matters more than perfect visual spacing. If you work from a fixed box, quick visibility may matter more. It depends on your environment, and a smart setup respects that instead of chasing a one-size-fits-all answer.
A dependable socket organization system should feel boring in the best way. You open the drawer, the right size is there, and the missing one stands out immediately. That is what organized looks like when it is built for real work, not just for the photo. Olsa Tools builds around that same idea - faster access, cleaner workflow, and gear that earns its place every day.
If your current socket drawer makes you stop and search, it is already costing you more than space. Fix the layout once, make every size easy to find, and let the next job move at the pace it should.